
Several days before Jim left to spend time out west with his twin brother, I coaxed him to help me carry this cupboard into the room beyond the kitchen which he calls the garage. [Formerly the Amish washroom.] Coaxing took the form of me getting a small rug under the cupboard [which was residing in the living room] and tugging it as far as the back door--from which spot it would necessarily have to be moved down the step if anyone wished to use the doorway.
I set about gathering my 'tools'--screwdriver to remove hardware, power sander, sanding disks and sandpaper sheets in varying grits, paint and my favorite brush.
With the paraphernalia collected and organized I found that my project had attracted too much 'help!'
Bobby Mac and Nellie felt the need to investigate!
The cupboard is one of a pair which Jim bought for me at auction when I was setting up a sewing/crafting space in the finished basement area of our first Kentucky house.
They are imports--nothing fancy--with veneer plywood sides and back, doors and framing of hardwood. There are removable wood edged glass shelves, and originally small lights were recessed into the inside of the tops.
I refinished one of the cabinets to place in the dining area of the Bedford stone house which we refurbished--an interim home of short duration as it turned out. There was no room for the second cabinet in that house, but it came with us to the Amish farmhouse and has sat here on one side of my piano, looking out of harmony with its painted mate on the other side.

I hadn't used the power sander since that project three years ago and find that it now judders my shoulder and wrist to a degree demanding I take frequent breaks.
I worked at this during intervals of several days, doing the finish sanding by hand, painting the interior before applying a base coat of paint to the exterior of the cabinet.
I don't use chalk paint or milk paint. I don't care for a chippy, scabby, peeling effect on my furniture. Decades ago when I first began refinishing furniture it was possible to buy oil-based paint in rich vintage colors from several specialty suppliers.
Oil-based is no longer available, although the same colors are offered in an acrylic base. I was less than pleased with my one experiment using the reformulated paint and quite dismayed by the price.
I prefer Valspar or Clark & Kensington in satin--which has only a slight sheen. I base-coat the pieces in a dark color--for the cabinets it was dark hunter green--a frugal use of the flat milk paint which I had rejected as a finished look.

I sand lightly before 'dry-brushing' on the top coat.
This color is 'Apple Grove' by C & K.
Some crafters, going for a 'primitive/county' effect suggest finishing with a wax, stain or glaze. I've not experimented with those having read reports of unhappy results.
I completed the cupboard renovation the day of Jim's return and together we scooted it into place by the piano.
I'm not particularly clever at arranging bits and pieces for a display. I decided that the woven check linens would be a good touch, then began thinking about various collectibles that have languished in boxes since our move.
After an hour of pottering with things in both cupboards I was over it!

Jim had stuck some of his collectibles in the earlier finished cupboard; all were in need of a good dusting. I regrouped some in what I considered to be a more pleasing assembly--but life intervened before I arranged anything on the top shelf.
Some rainy day I'll tackle that!

Have you gathered that 'Apple Grove' is a favorite color?
A quart of good paint goes a long way!
I ordered two peg racks through Amazon, finished one in two coats of green; one has a base coat of grey-white for a streaky/vintage effect.
The shelf with heart cutout was a charity shop find several years ago--awaiting some repairs by Jim.
[I wish I could use power tools--saws, staple gun, etc. I can't even drive a nail properly!]

One of these will likely be installed in the small guest bedroom. I used the same paint last year to refurbish my great-grandmother's small rocking chair which now lives in that quiet space.

I'm always pleased when I can salvage or repurpose a piece.

I was in the local Goodwill when I noticed a sturdy quilt stand. I pounced on it and dragged it to the check-out without quite registering that the price was $25. I would have liked it to be a few dollars less, but it is a sturdy oak piece.
The original finish was an orange-y stain/varnish.
I was intrigued by the peck holes in the wood, more visible once I had sanded off the old finish.
Our neighbors [who know such things] informed me that the wood had at one time been assaulted by powder post beetles. It would be interesting to know if the wood was host to them prior to construction of the stand, or did they take up residence at a later time.
I've been assured there isn't likely to be an on-going problem, so have decided to consider this a 'character' wood.

I started sanding [power sander] out in the washroom, then decided that it would be easier to put the thing at eye level on one of Jim's work tables in the shop.
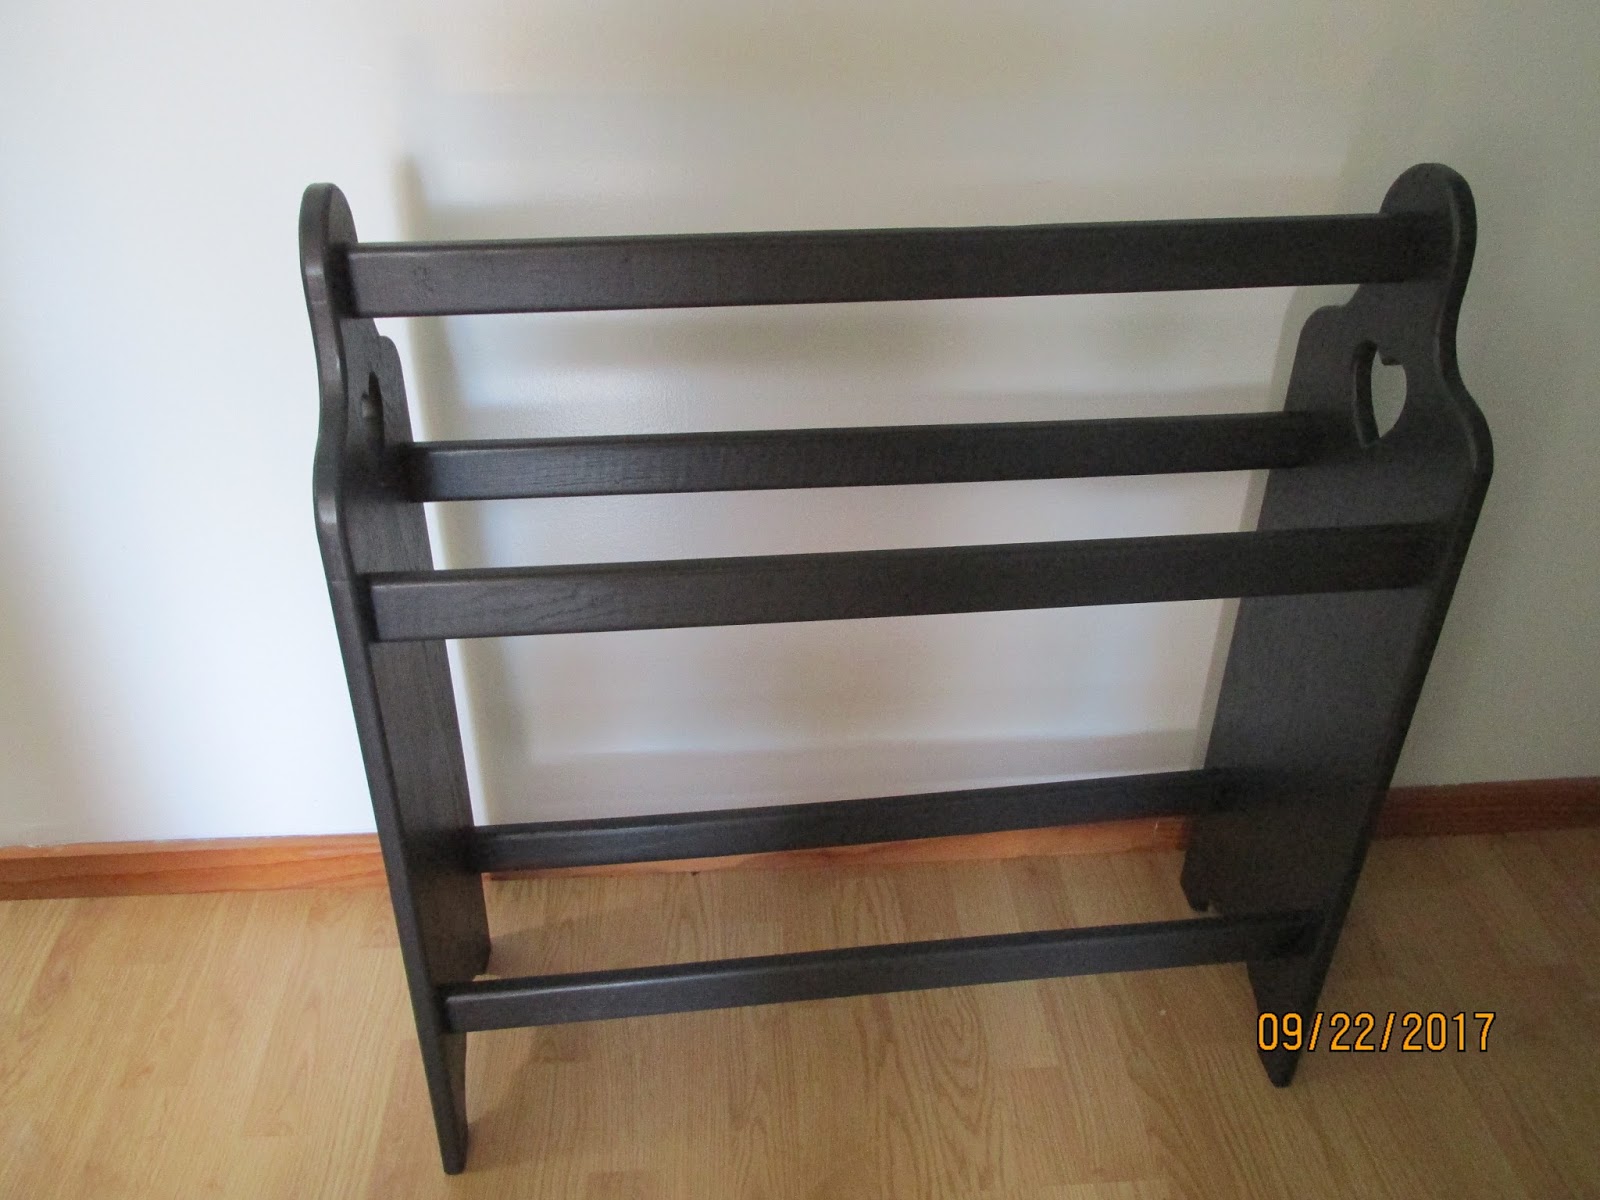
I finished the stand with 3 light coats of Valspar 'Tomcat'--a warm charcoal grey.

Not the best photo of this project--and taken before I had touched up the wooden caps that cover the screws. This was a piece of likely board discovered in my determined rootlings. It needed only to be trimmed to size, coated in my 'go to' Valspar 'Cannonball Black'. The hooks are brushed nickle.

For some time I have eyed similar shelves in the pages of Country Sampler magazine.
I left the magazine invitingly open where Jim's eye would fall upon it--because, after all, a man who has constructed houses and barns, who owns a shop full of sophisticated tools, could surely build such a thing from some of the boards lying about!
I had nearly given up hoping that the resident carpenter was going to get involved, when one morning [perhaps in exasperation, as I was rummaging in his space] he set up the planer and big table saw and in a mere few minutes had prepared several lengths of oak.
He put the shelf together to my specifications

This photo, taken with flash, shows the detail of hooks and brackets, but isn't true to color.
I based this with 'Cannonball Black', the topcoat is C&K 'Autumn Apples' darkened with some of the black.
I am very pleased with this shelf which is designated for the so-called 'dressing room' off the master bath. Installation awaits the whim of the master carpenter!
I'm definitely on a roll with wood and paint, hoping I can find more lengths of oak or maple to turn into shelves.

We bought this walnut desk at Peddlers Mall shortly after moving into the first Kentucky house.
I briefly coveted one of the wildly expensive fold-out sewing center cabinets--not really an option.
This sturdy vintage table served me well--until some nameless soul stood it on its top in the van we used for moving our worldly goods to the farmhouse.
The table emerged with a wicked gouge in the top. It was carried to the upstairs hall and I began determinedly to work on restoration while Jim was busy installing plumbing and electricity. Other tasks took precedence and the table stood in the hall [the only large space yet to be renovated] until this morning when Jim upended it on the upstairs guestroom floor.
You can see that bits on the legs and the drawer frame need to be sanded.

I hauled the drawer to the workshop and landed it on Jim's utility table.
As I have worked on this I've been intrigued to notice that the piece isn't original in all its construction. It was either fashioned from pieces of another table or desk or, more likely, at some time was repaired or repurposed by an amateur woodworker.
I removed the vintage style drawer pulls and discovered behind them the drilled holes that likely held older wooden knobs. The interior of the drawer appears to have ink stains and is slightly warped along the center seam as though the wood had once been wet.

The escutcheon and backing plate appear to be quite old. Several screw and nail holes in the sides and back of the drawer suggest that these bits once served another purpose.
I didn't get upstairs to work on the desk/table before daylight [and my energy] were fading.
I cleaned up and sanded the drawer, applied a coat of clear satin poly to the inside and side edges.
When I've finished restoring the desk it will be placed in the kitchen alcove which seems to have become my default sewing nook.
I have an old farmhouse cupboard to refinish and there is another quilt stand and a wall quilt hanger lurking upstairs in need of refinishing.
I suspect I would be wise to limit large projects requiring hours with the power sander--but I do love working with wood and paint; I enjoy the satisfaction of a functional and decorative object as a visible result of my labor.
Your tall cabinet came out beautiful. And, the quilt stand is a lovely design. You are very talented with furniture restoration. Enjoy your day, Pat
ReplyDeletePat; I'm giving myself a 'star' for finally painting that second cabinet. I decided I don't want to attempt another piece that is taller than I am--a quilt stand is more my size!
DeleteYou and I are so alike Sharon. We do very similar things to the "stuff" we rescue from car boot sale and auction. Like you, I am NOT enamoured of the chalk paint, but I have only tried the stupidly-thick-and-needs-watering-down Annie Sloane stuff yet. The wax finish I am OK with (which reminds me, I need to wax the top of the little round-topped bobbin leg table so it can go out for sale again (it has languished for a while now, despite several price drops).
ReplyDeleteI love the pieces you have worked on so far and would you believe, it is Valspar paint which we use here - only the emulsion for the walls. It is dear, but covers in one coat. We must try their satinwood finishes for the woodwork now.
I like the pale green you have used - we have a similar colour for the outside paintwork here (called Bay Tree).
I am thinking we definitely need another coat rack so will have to set to and put one together - Keith has plenty of wood out in his shed and workshop. A job for an autumn day I think . . .
Jennie; Sanding is definitely not the fun part of repurposing our finds--but choosing new colors is rewarding. We've tried quite a few brands of paint, and I'm sure there are many good ones. Valspar and C&K [an Ace Hardware in-store line] have become favorites. One coat coverage--I always have to do a second light touch-up. Color is important to me; when we moved in here I told Jim I couldn't face waking up to shiny pale blue paint--the Amish are required to use some shade of BLUE!
DeleteCoat rack: I'm reminded of something in the front hall of my grandfather's house--they called it the 'coat tree'--it was made with a lengthwise half round of log for the base, a branch for the upright and trimmed smaller branches drilled in at intervals for pegs--I think it was made from elm--all very smartly varnished.
I love that shade of green, if I were not such a lazy soul I see about 6 pieces around here I'd like to paint. The end table behind me might actually get sanded down and restrained in the foreseeable future.
ReplyDeleteJanet; I get on a roll and think I should paint lots of things--I brought an end table downstairs last week and have been wondering if it needs a new look. Perhaps its good that I run out of steam before tackling everything that comes to mind.
DeleteAs you say Sharon there is something enjoyable about working with wood and restoring furniture. 'Distressing' wood was very fashionable at one time, but you can now buy furniture in those lovely soft greys and greens.
ReplyDeleteThelma; I read several tutorials recently about refinishing 'country' furniture--the suggestion was made that one should gouge and beat on the pieces to make sure they appeared 'primitive.' That's not something I'm about to do. I wouldn't paint a piece that was an elegant wood or more formal in style; the simple pieces I'm working on seem homey with soft or rich colors.
DeleteYour projects turned out beautiful. I do love that soft green color. It's such a satisfying feeling when you can bring new life to an old piece. I have two of the very same wooden shelves with the heart cut-out in my sewing room. We put them up when my daughter's were young, as this was their bedroom. I left them unfinished pine, but they do look so pretty painted. I like your technique for moving furniture down steps :)
ReplyDeleteKaren; You've given me an idea! I think there is room for at least one of the small shelves in the alcove that has become my default sewing area!
ReplyDeleteRe moving furniture: for years I operated with 'the ant who moved the rubber tree plant' theory--it cost me a few trips to the chiropractor, to say nothing of awkward moments with something heavy 'stuck' where I didn't want it. Dragging something on a rug, into a traffic zone and then appealing to husband seems a better choice.
I like your cupboard in that green, Sharon. It's a colour I would not tire of too soon. Cupboards are so fun to play with, aren't they. I see you have a nice collection of wooden cats. They are nice but don't hold a candle to Bobby Mac and Nellie. Give them a hug for me.
ReplyDeleteDeb; I am fond of that 'Apple Grove' green--its a soothing color. Our cats feel that their presence enhances any setting--they pretty much have the run of the house!
Delete